I have finally returned home from a long, tiring, but extremely fun weekend!
This weekend I have started a Foundation Course in felt, which leads to a City and Guilds Level 1 qualification in Textiles, with Artybrid up in Carnforth. I first learnt about Artybird in 2011 when I attended my first Woolfest. Me and my Mum oohed and ahhed over the beautiful sketchbooks and samples of the felting the students had made and I decided then that I wanted to be a felter - I even bought a kit to make a felt flower (which I never did make) in my enthusiasm to learn this art. At that time, my weekends were rather hectic and I was unable to commit but, when I met them again at Woolfest, I knew that I had to do it!
So, after a few months of waiting for September to come around, trailing around shops to buy felting equipment (cane blinds, bubble wrap, dog brushes etc) and reading through the assignments for the first weekend, the day eventually came around and I was off up the M6 to learn how to felt.
The weekend has been amazing! I have made some new crafty friends, taken a completley new perspective on colour, made paper collages, dyed fabric and made my first ever piece of felt (which apparently was really good!!). My sketch book has started and I can't wait to spend more time on it next weekend, reflecting on what I have learnt and created so far.
If I write this post without giving credit to Mr Bunny, he may refuse to help in the future! He made me the perfect sprinkler for felting and sorted out some old towels for me. He is now tasked with creating me a washing line in the bathroom to dry all my dyed fabric (there just aren't enough radiators in the house!) and shortening my rather large broom handle into 2 smaller ones for felting). Thank you Mr Bunny.
I have enjoyed it all so much that I want to do it again tomorrow - I can't wait for the next weekend!
_________________________________________________________________________________
On a completley different, but not completley unrelated, note, The Gingerbread Bunny stall was out and about in Liverpool today at a belly dance event. My assistant Bunnies (Mum and Janice), kindly looked after the stall and did a brilliant job! I may hire them again! Thank you x

Showing posts with label course. Show all posts
Showing posts with label course. Show all posts
Sunday, 23 September 2012
Friday, 31 August 2012
Busy, Busy, Busy!
As the title suggests, I've been rather busy lately. My creative mojo is most defintley present and my head is full of crafty ideas for The Gingerbread Bunny.
I have been planning my newest venture, Crafty Parties for children and workshops for both children and adults and am currently checking out venues to hold these in. I am really excited about these as teaching is what I do. I love sharing my knowledge and passion with others and empowering people to be able to do it for themselves. I am hoping to hold my first workshop before the end of the year and then, come the new year, I can really get stuck into them.
I have also been working on some funky applique designs. This all came about because I wanted a t-shirt with a russian doll on and I couldn't find one anywhere. So, I decided to have a go at making one. I bought a vest and used the internet to find a suitable template and then set about using up scraps of fabric in my stash, some bondaweb, embroidery thread, felt and Suzie the sewing machine to put it all together. I really enjoyed making it and loved the finished product. My Mum thought I'd bought it! From this, ideas came into my head for other designs, including ones for bellydancers (my alter ego!) and it has taken off from there. I have developed 4 designs so far, Rita the Russian Doll, Oswald the Owl, Fatima and Tania the Tribal Bellydance Doll. There are plans in process for a Gothic Doll, a lotus flower and a yarn themed design. So far, I am creating vests, tshirts and tote bags but again can see project bags for knitters and crocheters, children's tshirts and even babygrows in my applique future - if it stands still, it is in danger of being appliqued!
I am still crocheting as well and have just completed a custom shrug for my aunty to wear to a wedding. I used some lovely orange Sublime bamboo and pearls yarn which is so soft and has a beautiful sheen to it - ideal for a wedding! The design was very simple and, to add a bit of something special, I bought 2 beautiful bamboo buttons from the Textile Garden which had branches and orange flowers painted on - they really finished it off. I would highly recommend the Textile Garden for buttons, shawl pins, clasps and even funky ribbon.
The new term brings lots of new courses to. At the end of September I am starting a City and Guilds Felting Course with Artybird in Carnforth. It involves me attending 1 weekend a month for around a year and I am so excited about it. I have always wanted to learn how to felt and this is a great course. At Woolfest examples of work and projects were out to look at and, I have to say, it was amazing. I only hope my work is as good.
I am also hoping to do a 6 week dressmaking course starting in November. My aim is to be able to make an A-line skirt out of the beautiful Amy Butler fabric I bought in the sale from John Lewis last month. I am far to scared to take the scissors to it at the moment so this should, hoepfully, help me turn it into something I can wear.
And finally, at the end of November I am returning to The Tribal Sleepover (a bellydance event in Huddersfield) to teach 2 crafty workshops in Fabric Flowers and Art Journaling. I have some exciting ideas planned and I am really looking forward to sharing my love of craft with others.
To add to all this, the full time day job has returned. The summer holidays are officially over and my crafting has to fit in with my job as a primary school teacher. For the time being, crafting is limited to evenings and weekends although change is on the horizon and 2013 is definitley bringing new starts and challenges for myself. Watch this space!
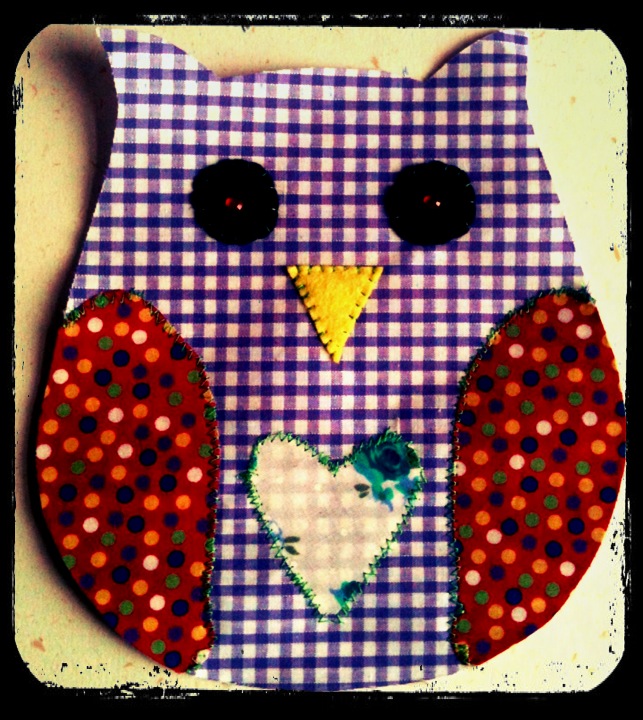 |
| Look what I've been up to - Oswald the Owl |
As the title suggests, I've been rather busy lately. My creative mojo is most defintley present and my head is full of crafty ideas for The Gingerbread Bunny.
I have been planning my newest venture, Crafty Parties for children and workshops for both children and adults and am currently checking out venues to hold these in. I am really excited about these as teaching is what I do. I love sharing my knowledge and passion with others and empowering people to be able to do it for themselves. I am hoping to hold my first workshop before the end of the year and then, come the new year, I can really get stuck into them.
I have also been working on some funky applique designs. This all came about because I wanted a t-shirt with a russian doll on and I couldn't find one anywhere. So, I decided to have a go at making one. I bought a vest and used the internet to find a suitable template and then set about using up scraps of fabric in my stash, some bondaweb, embroidery thread, felt and Suzie the sewing machine to put it all together. I really enjoyed making it and loved the finished product. My Mum thought I'd bought it! From this, ideas came into my head for other designs, including ones for bellydancers (my alter ego!) and it has taken off from there. I have developed 4 designs so far, Rita the Russian Doll, Oswald the Owl, Fatima and Tania the Tribal Bellydance Doll. There are plans in process for a Gothic Doll, a lotus flower and a yarn themed design. So far, I am creating vests, tshirts and tote bags but again can see project bags for knitters and crocheters, children's tshirts and even babygrows in my applique future - if it stands still, it is in danger of being appliqued!
 |
| Rita the Russian Doll |
The new term brings lots of new courses to. At the end of September I am starting a City and Guilds Felting Course with Artybird in Carnforth. It involves me attending 1 weekend a month for around a year and I am so excited about it. I have always wanted to learn how to felt and this is a great course. At Woolfest examples of work and projects were out to look at and, I have to say, it was amazing. I only hope my work is as good.
I am also hoping to do a 6 week dressmaking course starting in November. My aim is to be able to make an A-line skirt out of the beautiful Amy Butler fabric I bought in the sale from John Lewis last month. I am far to scared to take the scissors to it at the moment so this should, hoepfully, help me turn it into something I can wear.
And finally, at the end of November I am returning to The Tribal Sleepover (a bellydance event in Huddersfield) to teach 2 crafty workshops in Fabric Flowers and Art Journaling. I have some exciting ideas planned and I am really looking forward to sharing my love of craft with others.
To add to all this, the full time day job has returned. The summer holidays are officially over and my crafting has to fit in with my job as a primary school teacher. For the time being, crafting is limited to evenings and weekends although change is on the horizon and 2013 is definitley bringing new starts and challenges for myself. Watch this space!
Saturday, 31 March 2012
Patchwork Project Bag
It seems like such a long time since I last blogged (probably because it is!) I have been busy working on a number of projects, many of which I have completed, and now have plenty to keep me going with my blogging for the next few weeks.
As part of the textiles course I have been attending at night school, we looked at patchwork. I really love the mix and match look of patchwork and have had a go at a few projects using simple rectangular strips of patchwork in the past. On the course we looked at the use of hexagons to create patchwork, a technique very popular in Victorian times and again in the seventies. In class I made a simple hexagon patchwork flower, using some patterned fabric from an old skirt, which could very simply be used to decorate a cushion cover.
Everyone on the course chooses a final project to make. I have been dying to make the hexagon patchwork knitting bag from Cath Kidston's Sew for a long time and saw this as my opportunity to finally get it made. Now, this wasn't a small project - would I pick anything easy? And has taken me quite a long time to finish. This is why:
It required 60, yes 60, hexagons to make the bag. That meant:
Cutting out 60 small paper hexagons. (I used an old magazine)

Cutting out 1 larger paper hexagon to use as a template to then cut out 60 fabric hexagons


Sewing all 60 hexagons together, in a specific way, to make the bag and then sewing in the lining and attaching the handles!

A lot of work? Definitley, but I really really enjoyed it! It was a great project that could be picked up and put down as and when. Some nights I managed 2 or 3 hexagons whilst other days I would make lots of progress. It was really rewarding to watch it grow and to see how all the different patterns of fabrics came together and I love my finished bag.
In the interests of sustainability, and saving some pennies, I used fabric from my stash. There are fabric scraps left over from past projects, fabric from old clothes, fabric from larger pieces I have and, if you look carefully, fabric from the printing I did earlier on in the course; I just made sure that they were all of similiar weights. Each fabric appears no more than 3 times and I arranged them carefully to create a real mix of pattern and colour. The lining fabric and handles I already had; I bought absolutley nothing new to make it.
Now I have caught the patchwork bug, I am desperate to tackle a large project - a cushion? another bag? or maybe an entire quilt??
As part of the textiles course I have been attending at night school, we looked at patchwork. I really love the mix and match look of patchwork and have had a go at a few projects using simple rectangular strips of patchwork in the past. On the course we looked at the use of hexagons to create patchwork, a technique very popular in Victorian times and again in the seventies. In class I made a simple hexagon patchwork flower, using some patterned fabric from an old skirt, which could very simply be used to decorate a cushion cover.
 |
| The patchwork page in my sketchbook |
It required 60, yes 60, hexagons to make the bag. That meant:
Cutting out 60 small paper hexagons. (I used an old magazine)

Cutting out 1 larger paper hexagon to use as a template to then cut out 60 fabric hexagons

Sewing 60 fabric hexagons over the 60 paper hexagons

Sewing all 60 hexagons together, in a specific way, to make the bag and then sewing in the lining and attaching the handles!

A lot of work? Definitley, but I really really enjoyed it! It was a great project that could be picked up and put down as and when. Some nights I managed 2 or 3 hexagons whilst other days I would make lots of progress. It was really rewarding to watch it grow and to see how all the different patterns of fabrics came together and I love my finished bag.
 |
| My finished bag |
Now I have caught the patchwork bug, I am desperate to tackle a large project - a cushion? another bag? or maybe an entire quilt??
Tuesday, 13 March 2012
Couching
In what appears to be a catch-up series of posts, I wanted to share with you all some more of my work from my textiles course, couching.
Couching is the technique of sewing down fabrics, yarn and other fabrics to a large piece of cloth.
It is generally thought of as an embroidery technique and examples of couching can be seen on medieval textile work including the Bayeux Tapestry! It is still a technique that is popular today, being used to decorate Indian and Palestinian clothing, most commonly wedding dresses and formal wear.
For my sample, I found examples of couching work on the internet and Pinterest, and then found whatever I could lying around, yarn, scraps of fabric and even some plastic, and stitched it down! You can use straight forward running stitches or more fancy embroidery stitches to sew them down and can sew the fabrics straight or in spirals, zig zags and curves.
Couching is a simple but effective way to decorate a piece of work and I think it would fabulous on bags, purses and other small items.
 |
| Examples of couching can be seen in the Bayeux Tapestry |
In what appears to be a catch-up series of posts, I wanted to share with you all some more of my work from my textiles course, couching.
Couching is the technique of sewing down fabrics, yarn and other fabrics to a large piece of cloth.
It is generally thought of as an embroidery technique and examples of couching can be seen on medieval textile work including the Bayeux Tapestry! It is still a technique that is popular today, being used to decorate Indian and Palestinian clothing, most commonly wedding dresses and formal wear.
For my sample, I found examples of couching work on the internet and Pinterest, and then found whatever I could lying around, yarn, scraps of fabric and even some plastic, and stitched it down! You can use straight forward running stitches or more fancy embroidery stitches to sew them down and can sew the fabrics straight or in spirals, zig zags and curves.
 |
| My couching sample |
Sunday, 11 March 2012
Printing pretty pictures
As you are probably already aware, I have been attending a textiles course at night school since September. I have had a great time, met some wonderful people and learnt lots of new skills and techniques along the way. I have already told you about some of the things I've been up to in my previous posts, Embroidery and Cross Stitch, All about Applique and Rag Rugging.
Today's post is about printing, more specifically batik and acrylic paint printing. I found myself really enjoying both of these techniques and am keen to try my hand at other printing styles now.
Batik
Batik is the craft of using wax and dye to create pictures and patterns on fabric. It is a printing technique often seen in textiles from countries such as Java, Indonesia andAfrica and has been practised for many centuries.
Using hot wax and a tjanting tool, a pattern is created on the fabric (I sketched my picture out in pencil first so I knew what I was doing). When the dye is applied to the fabric, the areas where the wax has been applied resist the dye, thus creating the picture. Once dry, brown paper is placed over the top of the picture and then you iron the fabric to remove the wax.
I made 2 batik pieces on the night:
A tree

and a small sock knitting project bag for my friend as a Christmas present.
Polysterne Block Printing
This technique involved using polysterene (the sort you find on the back of pizzas in supermarkets) to create a printing block. I used a sharp pencil to etch my design deeply into the polysterene.


A ball of yarn with a crochet hook

And my multicoloured I heart Crochet

Today's post is about printing, more specifically batik and acrylic paint printing. I found myself really enjoying both of these techniques and am keen to try my hand at other printing styles now.
Batik
Batik is the craft of using wax and dye to create pictures and patterns on fabric. It is a printing technique often seen in textiles from countries such as Java, Indonesia andAfrica and has been practised for many centuries.
Using hot wax and a tjanting tool, a pattern is created on the fabric (I sketched my picture out in pencil first so I knew what I was doing). When the dye is applied to the fabric, the areas where the wax has been applied resist the dye, thus creating the picture. Once dry, brown paper is placed over the top of the picture and then you iron the fabric to remove the wax.
I made 2 batik pieces on the night:
A tree

and a small sock knitting project bag for my friend as a Christmas present.
Polysterne Block Printing
This technique involved using polysterene (the sort you find on the back of pizzas in supermarkets) to create a printing block. I used a sharp pencil to etch my design deeply into the polysterene.


Then, acrylic paint, diluted with a touch of water, was applied to the block and then the block pressed firmly onto the fabric to print on the design.
I made 2 repeated patterns on my fabric.

And my multicoloured I heart Crochet

Both of these fabrics are now being used in my final project for this term which will be revealed when it is finished!
There are, of course, many different types of printing techniques included using stencils and screen printing.
Sunday, 30 October 2011
All about applique
I am a little bit behind on my textile course updates! (Ooops - sorry!) Being half term, my class hasn't been on this week but I am looking forward to learning all about trapunto quilting tomorrow night. So far we have covered rag rugging, applique (the subject of today's post) and embroidery and cross stitch. I have to say that I am really enjoying the course and have learnt lots of new techniques, met some fabulous people and have been truly inspired. One aspect of the course that I am finding really useful and fun is keeping my themed sketch book and I will definitley be applying this strategy to my crafting at home. It is just such a great way to store ideas and inspiration.


So, on to applique! Applique is the craft of sewing, or attaching, one piece of fabric to another. The word applique comes from the French, appliquer, which means to put on. It is a technique which is believed to have been around since people could sew and quite possibly began as a way of patching holes up in clothing. One of the earliest examples found was in Egypt depicting a ceremonial canopy. Today applique is a very popular technique used to decorate all manner of items by adding shapes and pictures in contrasting fabrics to the base.
We learnt the quick and easy way to applique using bondaweb and it is just fantastic! In class I appliqued a very simple tree shape and it worked really well. I have also made my bellydancer phone cases from felt, appliquing (is this a word?) the bellydancer onto the base cover. I don't use bondaweb for these as the felt 'sticks' to itself and doesn't move around when sewing.
I really enjoyed applique and am planning on using this technique to make some Christmas cards for friends and family. If you haven't given it a go, I really suggest you do!


So, on to applique! Applique is the craft of sewing, or attaching, one piece of fabric to another. The word applique comes from the French, appliquer, which means to put on. It is a technique which is believed to have been around since people could sew and quite possibly began as a way of patching holes up in clothing. One of the earliest examples found was in Egypt depicting a ceremonial canopy. Today applique is a very popular technique used to decorate all manner of items by adding shapes and pictures in contrasting fabrics to the base.
We learnt the quick and easy way to applique using bondaweb and it is just fantastic! In class I appliqued a very simple tree shape and it worked really well. I have also made my bellydancer phone cases from felt, appliquing (is this a word?) the bellydancer onto the base cover. I don't use bondaweb for these as the felt 'sticks' to itself and doesn't move around when sewing.
 |
| My (very simple) applique tree |
I really enjoyed applique and am planning on using this technique to make some Christmas cards for friends and family. If you haven't given it a go, I really suggest you do!
Wednesday, 5 October 2011
Rag Rugging
 |
| Textiles photo courtesy of jeni rodger via Flickr |
This week I started an evening class. I have been searching for an arty course at night school for ages and, at the start of September I was most excited to find that a local high school was offering a 10 week textiles course. Squeal! So I enrolled and this week saw the start of the course (last week was all about the paperwork!) Each week I plan to share what I have learnt and any work I produce.
As part of the course I have to choose a theme and keep a sketchbook to inspire my final project, which I have yet to decide on. After much thought I have chosen trees as I just love them.

This week we learnt about the traditional British craft of rag rugging. Rag rugging is the process of using strips of fabric, usually old clothes or oddments of fabric, to make a rug using a variety of techniques. In Victorian times rugs would be made from old clothing, usually out of necessity to reuse what they had. These would move around the house until finally they had fallen to bits. This is why there are very few examples of old rag rugs today although evidence has been found of rag rugs being made and used in Celtic and Viking homes. It was in America, most recently, that rag rugging was recognised as an art form and now the techniques are used to create not only rugs but cushions and even jewellery.
There are many different techniques used to rag rug, many being specific to certain parts of England, but generally these are either hooked and prodded. The hooked technique uses a long strip of fabric and a hook, for example a crochet hook, to hook the fabric through the holes of your base fabric creating a lumpy, bobbly texture. The prodded technique involves using much smaller pieces of fabric and then poking them through the holes, creating a shaggy texture to the rug. In the north of England proddy tools where often made form an old dolly peg with one leg sharpened.


Pages from my sketch book.
I think rag rugs are beautiful and Kirsty's Homemade Home TV series inspired me to try out rag rugging using the proddy method. However, I didn't really like the technique or the effect that I got when I tried it and so abandonded it. Learning the hooky method has re-inspired me to get rag rugging again- I love it (probably because it is very similar to crochet!)
My sample for my course is a very simple tree made using 4 different fabrics, to see what effects they would create, and using both the proddy and the hooky techniques. I am really pleased with the final result.
 |
| My rag rug tree |
I am so pleased that I enrolled on the course and am enjoying it so much. Next week is applique and I can't wait!
Subscribe to:
Posts (Atom)