Welcome


Welcome to The Gingerbread Bunny! I'm Sarah, a textile artist specialising in crochet and felt based in Wigan in the North-West of England.

On my blog, you can find my day-to-day craft adventures and tutorials.

You can find details of my work for sale and workshops on my website - www.thegingerbreadbunny.co.uk

Monday, 31 August 2015

Dress Making at Dollys!


Last Thursday was super exciting as I went on a dress making workshop!

I caught the train from Wigan to Warrington - a short 10 minute journey - to go to Dolly's Haberdashery & Sewing School to make a Picnic Dress.

The first thing I loved was the shop front. Then I entered the shop and it's just so quirky - there's a beautiful vintage skirt on a mannequin, a super cute children's dress and lots of fabric, ribbons, zips and other haberdashery items. 

Lindsey is the owner and teacher and is just lovely - she was wearing the most amazing dress she'd made (of course) in vintage fabric. She is a wealth of knowledge and experience in dress making as well as being a geat teacher: she really knows her stuff. 

There were 6 of us on the workshop - a great number as we got the attention and support we needed. Most importantly, the teapot was always full and there were biscuits & cake to fuel our sewing needs.

At the end of the day I was exhausted but I'd made a dress - yay! 


There are still a few tweaks to make and I'm going to add ric rac round the bottom of the skirt, but after my day I feel confident to do this myself. I learnt do much in just one day, I put a zip in correctly on my first attempt (in the past this has taken me many gos) and stitched darts and bias binding! 

So now I just need to decide which workshop to do next! 

Go and check out www.dollyshaberdasheryandsewingschool.wordpress.com 

Monday, 10 August 2015

How to - 5 Great Pom Pom Crafts


I just love Pom Poms! They're easy to make and can be turned into so many things.

All you need to make them is yarn, scissors and some form of Pom Pom maker.  You might want extra bits, such as wiggly eyes, pipe cleaners and felt, to turn them into creatures

As a child, Pom Poms were made using 2 circles of cardboard. Of course, you can still make them this way but I thoroughly recommend the new Pom Pom makers that split in the middle and make Pom Pom making so much easier. They also come in lots of different sizes to. You can buy these from most yarn and craft shops as well as online.

Pom Pom Animals

Pom Poms are great for creating animals. From bunnies to sheep, cats to octopuses, just add some wiggly eyes, bits of felt and pipe cleaners and you've got yourselves a menagerie of creatures! 

Pom Pom Monsters
If animals aren't your thing, why not create some monsters? Let your imagination run wild and create some truly scary monsters. Combine yarn colours, Pom Pom sizes, add lots of eyes in different sizes, create multiple arms with pipe cleaners. Before you know it, monsters will be taking over your home. 

Check out this great tutorial - http://thepurplepug.blogspot.co.uk/2011/03/yarn-pom-pom-monster-tutorial.html

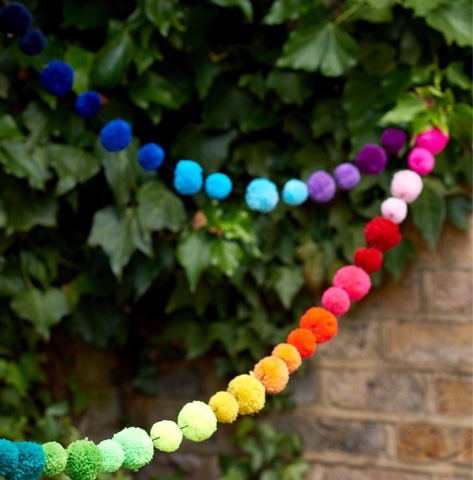
Pom Pom Garland


These are just perfect for decorating your room or even the garden. 

Make lots if Pom Poms in different colours. When you tie the middle, leave a long tail to attach them to one long piece of yarn. String them up everywhere and enjoy.

Pom Pom Flowers


Another great decoration for any room.

You'll need lots of Pom Poms, sticks (the ones you use in the garden are great or, if you want a more natural look, why not go out and collect some?) and some glue.  Just blue your Poms Poms to the top of the sticks, leave to dry and then display in a beautiful vase.

Pom Pom Book Marks


You can never gave too many bookmarks and these mark your pages perfectly.

You'll need Pom Poms, lollipop sticks (you can buy these from craft stores and the children's craft section in the supermarket) and glue. Just glue your Pom Poms to the top of the lollipop stick, leave to dry and then enjoy.  You could turn your Pom Poms into animals or monsters! 

Wednesday, 29 July 2015

How to Finger Crochet


The summer holidays are well under way here in Wigan!

Sadly, the weather isn't what it should be: it's raining, cold and I've had to put a wooly cardigan on as I refuse to turn the heating on in July.

Miserable weather doesn't have to mean miserable children. There are lots of exciting art and craft activities you can do at home that will keep your little ones (and yourself) entertained. 

Finger Crochet

Finger crochet is a fantastic introduction to crochet. Children often find it tricky to co-ordinate the hook and yarn and finger crochet offers them a way try it out.  I taught finger crochet as part of a family learning session last year, and the children lived making great long chains which they then plaited together to make necklaces and scarves they adored wearing. 

All you need to get started is some yarn and your fingers! You want something quite substantial and thick: chunky yarn, a few strands of finer yarn held together or you could even cut up an old tshirt or  fabric to make your own yarn! 

This is a great video, showing you how to finger crochet. I recommend that you just stick with the chaining for children (shown at the start of the video). How to work into the stitches is shown later in the video, great for teenagers and for yourself as I'm sure you'll be joining in to! 


Once you get started, there's no limit to what you can create - from one skein scarves to beautiful rugs -  there'll be no stopping those crocheting fingers.

Monday, 6 July 2015

Under the Sea - A Water Themed Art Project

So last week I was in a lovely school in Wigan, St Catherine's, working on a big felt project.

The theme was water and that led us to a lovely design featuring lots of sea animals. The school has links to a school in South Africa and two teachers came to visit that week - Vivienne and Godfrey. This influenced the design with a mixture of British and South African sea animals featuring. 

Part of the project was making a smaller hanging to go back to South Africa - it's very exciting to think that a piece of my work is now over there! 

Every child, members of staff and both visitors participated and contributed to the work. I love sharing felt making with others and my favourite bit is when they've managed to felt and stick the wool together - it's like magic! 

Here are a few photos from my week!

           A gift to take back to South Africa

                         Making felt seaweed

                                         A little fishy before felting

                                      How amazing is this Killer Whale?

       Creating the first panel - British Sea

  The second panel all ready to felt - South Africa Sea


The panels are now all dry and ready to be prepared for hanging (I sew a thin channel of fabric to the back to be threaded onto a pole) and then I'll take them back to school to be hung. I can't wait to see them up! 

Tuesday, 5 May 2015

Crochet Trend 2 - Rainbows

So, here is the second trend I'm blogging about as part of Deramores (the lovely people who sell all the lovely yarn and now sell West Yorkshire Spinners - squeal!) blog competition. The trend for this post was originally blogged by Heather Leal of The Patchwork Heart. 

Rainbow Colours


                                          Rainbow Hook and Pencil Cup by Fibre Flux

If you didn't already know, I love colour! Rainbows take colour to a whole different level in colour choosing. We often think of a rainbow as being bright and bold and, when I was browsing through Ravelry, I discovered I'd favourited a number of patterns which all use bright rainbow colours.  There are a few areas to consider when crocheting a rainbow:  

Stripes vs Varigated

There are 2 ways to achieve a rainbow in our crochet.

Jessie Rayot's 'Skylark in Wonderland' uses mini skeins to create this beautiful rainbow shawl. 

The first is to use stripes. Changing colour at the end of each row or round (make that last pull through before you change colour in your new colour for a nice, clean change). This gives you beautiful, clean stripes where you want them and you can use however many colours you would like - think of the giant rainbow you could create?!   However, it can mean lots of ends to weave in - for me, the biggest chore of crochet!

This beautiful shrug by Bernadette Ambergen is called 'Rainbow' and uses a varigated yarn to create a rainbow.  Long colour changes create stripes without too many yarn ends to weave in.

Varigated yarn takes the millions of ends to weave in away and someone has selected your rainbow colours for you! However, you have no control over how long your stripes will be, when the next colour will start or the number of colours in your rainbow. 

You also need to be aware of the length of your colour changes. In the shrugs the colour changes are lovely and long creating beautiful stripes.  In the flower below, the colour changes are much shorter, lasting only 2 or 3 stitches. Your project will determine the length of colour change you want. Although a short change is effective in a small flower or shawl, would you want to wear it as a jumper? 

 Crocheted flower produced by a student on one of my workshops. The short colour changes in this yarn are very effective in a smaller project. 


Choosing Your Rainbow Colours

I love the way we all have our own palette we steer towards when we choose colours - mine are pinks, purples, teals, turquoises and emerald greens. Although this is wonderful, and I love seeing how other people combine colour, it can make choosing colours for a rainbow a bit daunting. 

1) Firstly, a rainbow doesn't have to be bright and bold. It can be more subtle, like the pastel shades in this flower. It could be an earthy rainbow of rusty oranges, browns and greens or a neutral rainbow of greys, black and white. 

Pastel rainbow flower crocheted by a student on one of my workshops. 

2) You can start by getting your stash out, or visiting your local yarn shop, and looking at different ways of combining the colours. Start with 2 or 3 colours and put the balls of yarn next to each other. Introduce other colours and see how they affect your choice so far - do they brighten it or dull it? Does it make you smile or grimace? Keep playing around until you find the colours that make your heart sing.

3) Do you have a ball of varigated yarn you love? You could use this to crochet your rainbow but, if you want beautiful, clean stripes,  then pick out the individual colours within it and use these as solid colours to create your rainbow.

   A very different type of rainbow by Attic 24. Cosy Striped Blanket. 

4) Finally, look at other peoples rainbow projects and how they combine colours. Use their colour choices to inspire yours. There are lots of crocheted rainbows out there so there's plenty of inspiration to be found.  Attic 24 is a great source of inspiration for your rainbows!

I hope this post has given you some inspiration to start your crochet rainbow. 

This post is my submission to the Deramores Craft Blog Competition 2015. Deramores is the UK’s number one online retailer of knitting and crochet supplies. Visit www.deramores.com for more details. 


Friday, 1 May 2015

Crochet Trend 1 - Large Motifs

Deramores (the lovely people who sell a wide array of yarn in just about every fibre and colour) have launched their Blog competition for 2015. They've asked 6 bloggers to share what they think is a key crochet or knitting trend and then we (the bloggers who hope to win £500 of yarn - that's a lot of yarn!) share our take on the trend. It's definitley worth checking out the competition and it really does get you thinking about your crochet (or knitting!)

Large Motifs

The first trend I'm going to blog about is large motifs as previously blogged about by Dedri Uys of lookatwhatimade

This trend jumped out at me right away as I'm currently part of the Moogly Afghan Square CAL, making large afghan squares to stitch together to make a blanket.

I started just before Christmas, using yarn from my stash,  with the 2014 motifs and am now working through the 2015 squares as they're published - I get very excited waiting for the next one.

The great thing about large motifs is that not only do they look fabulous, and can be made using the ends of yarn balls from other projects, but, for those of us that are a little impatient, you feel like your making progress towards your blanket rather quickly (and there aren't as many squares to stitch together so less ends to weave in.)

Large motifs aren't only great for blankets but can be used for a whole range of projects - cushion covers, bags and how fabulous would one look on the back of a crochet jacket? I definitley need to try the jacket idea!

Here are my 5 favourite large motifs from the Moogly CAL:

Flower Tile Afghan Square - http://www.ravelry.com/patterns/library/flower-tile-afghan-square


More V's Please - http://www.ravelry.com/patterns/library/more-vs-please---12-square


Tamara's Kismet Square - http://jessieathome.com/tamaras-kismet-square


Starburst Square - http://www.triflesntreasures.com/my-attempt-at-blogging/starburst-squarefree-12-afghan-square-pattern#.VUN3l354WK2


Pinwheel Afghan Square - http://www.ravelry.com/patterns/library/flower-tile-afghan-square


This post is my submission to the Deramores Craft Blog Competition 2015. Deramores is the UK’s number one online retailer of knitting and crochet supplies. Visit www.deramores.com for more details. 


Tuesday, 14 April 2015

Cherry Pi is Finished and Northmoor Lock started!

It's finished!!
I unpinned my Cherry Pi shawl on Saturday morning and wore it to the crochet workshop I was teaching in Horwich that day - it was admired a lot! 

I also wore it yesterday and I plan on wearing it a lot more.  

Here I am modelling it!


You can wear it in many ways and it is the perfect shawl for those 'not as warm as they should be' spring days. 

I'm now catching up to Michelle who is over halfway through the next shawl from the book we're crocheting, Northmoor Lock.

I started mine last night using a skein of hand dyed sock yarn from The Knitting Goddess called 'When Granny Weatherwax Knits Socks' in the colourway Octarine. The pattern crochets up very quickly and I'm nearly halfway through my yarn so it's nearly time to start decreasing (and I only started it last night!) 

Here it is at the beginning.


I'm hoping to have this finished by the end of the week so I can take it away with me on my mini-holiday to Northumberland.

You can find the link to buy the ebook featuring 6 beautiful shawl patterns, including Cherry Pi and Northmoor Lock, designed by Joanne Scrace of The Crochet Project here: http://www.ravelry.com/patterns/library/cherry-pi-2


Wednesday, 8 April 2015

Cherry Pi is Blocking!

This morning I blocked my Cherry Pi shawl.

I finished it on Monday and, I have to be honest, I just couldn't see how it was going to work. I thought I had completely messed up the pattern and that I was going to have to rip it back. 

There was much discussion between me and Michelle about this (she is quite lucky as she hasn't finished hers yet do she can learn from my experiences) about my worries and pre-blocking traumas. 

I was so wrong!

This morning I've blocked my shawl and it is magical! I know blocking makes a big difference to your crochet but with the Cherry Pi shawl it is just amazing. Here it is on its first block (this shawl calls for an aggressive block which doesn't mean shouting at it but blocking it a bit further later on!)


Joanne Scrace of The Crochet Project and The Shawl Project is a shawl designer legend! 

Monday, 6 April 2015

New Studio Space!

I've been in my studio in Nooch for nearly 9 months now. I loved my space - working and teaching in there. It's been fabulous. Yesterday I moved across the shop into a bigger, brighter space.  It's got a hard floor so I don't have to worry about getting the floor wet, more windows so plenty of natural light and more space so I can fit more people in for workshops! 

I'm really looking forward to working and teaching in my new space!!


Saturday, 4 April 2015

The Shawl Project - Cherry Pi Update

They are nearly finished! Although this hasn't been without its many traumas.

Sarah's Traumas

1) I crocheted 5 rows and then ripped them back as I didn't think they looked right only to see Michelle's looked exactly the same.

2) I ran out of yarn with a good way to go. The 2 balks of yarn I was using had been opened and possibly some of it used. Luckily, I was using a commercially produced sock yarn and could order another skein - phew!

3) I realised I'd gone down a hook size rather than up (I'm a tight crocheter) but after trauma number 2, I think that was a good thing.

Michelle's Traumas

1) She kept making a mistake on one if the tows which she only discovered on the next row and had to rip lots of crochet back.

2) She has run out of yarn. Her yarn is a gorgeous hand dyed so emergency yarn cannot be purchased. We are currently contemplating the following options: buy an accent colour for the last repeat or rip back yo the mesh section, pull a few rows out so there's enough for the pretty lace section. Michelle is rather traumatised!

Despite our traumas, we do love, love, love the shawl. It is so pretty and lacy. We have learnt that really we need to gauge swatch for the other shawls to make sure it's correct (I'm a bit of a wing it crocheter - I like to live on the edge!). 

I'm hoping to finish mine over the Easter weekend so be ready for some before and after blocking pictures. 

Friday, 20 March 2015

The Shawl Project - Cherry Pi

As you may recall from my Edinburgh Yarn Festival post, I bought an amazing book - The Shawl Project from those lovely ladies at The Crochet Project, Kat Goldin and Joanne Scrace. The book features 6 gorgeous patterns designed by Joanne, as well as a great section about designing your own shawls.

As Michelle bought the book to, we decided that we would make the shawls together. 

So, on Thursday night, at knit group, we started our first shawl, Cherry Pi.

We picked it because we liked it and it said it was easy (we want to break ourselves in gently!)

I'm using 2, 50g balls of Knit Picks sock yarn in a lovely bright pink with sparkly thread in it. It's been loitering in my stash for ages, a Christmas gift from my husband a few years ago, and needed to be liberated. It's very soft to work with and has great stitch definition. On Thursday night, I completed the first section of the shawl which is worked in trebles and is super pretty on its own.


Michelle is using some utterly gorgeous green sparkle sock yarn by Old Maiden Aunt which she bought at Edinburgh last weekend. I have serious yarn envy over this - it's delicious!
Michelle had nearly completed the first section on Thursday night.


However, she has raced ahead of me yesterday and is now onto the second section of the shawl, worked in clusters. She says the clusters are very pretty but struggled to work out which bit of the cluster stitch was the top on the next row. A bit of playing about and she had sorted it. It's looking very pretty.


I'm hoping to make some progress on mine tonight! Keep checking back for updates! 


Monday, 16 March 2015

Edinburgh Yarn Festival 2015

I'm very lucky to be writing this from my bed with a lovely cup of green tea with lemon and I've just polished off 2 crumpets with jam - yum!

I've had a particularly busy weekend which has been so much fun. Yesterday, as it was Mother's Day, I invited my Mum and our friend Janice round for a vegan afternoon tea. I baked tomato and Rosemary scones (which were just divine) along with other goodies. It was a lovely afternoon.

Anyway, I really want to tell you about Saturday and my trip to Edinburgh Yarn Festival.  

Back in January, I just had a look at train prices and discovered I could travel for £11 each way. Of course, I had to book them at that price and it was a great excuse to meet up with my friend Jo (aka Shinybees) as she now lives way up north in Elgin. My friends, Michelle and Debbie, on hearing the bargain price, decided to come to and so the adventure began.

Our train left Wigan at 7:38am so Mr Bunny dropped us off at Starbucks so we could fuel our journey.  
Here we are waiting at the station with rather excited faces fuelled by caffeine!


The train journey was lovely with beautiful views, lots of crochet and chatter about our day ahead. 
It only takes about 2 1/2 hours to get there so we arrived around 10:15, jumped in a taxi and headed to The Corn Exchange.

Lots of yarn addicts where waiting enthusiastically outside. We joined the queue. It moved quickly. We chatted to the security guard about his need for a woolly head. We got inside. We got our wrist bands. We put our coats in the cloakroom. 

First stop, find Jo, hug, catch up and give her her birthday present, my goddaughters and my nephews (I'm a fake northern Aunty!!!) She was in the podcaster lounge along with Louise from Caithness Craft Collective. We entered the free raffle - and Michelle won a prize! 

Then to do what we came for - shop - Wow! What a gorgeous array of stalls. There was just about everything you could want or need and, as ever, I was completely overwhelmed! Gorgeous hand dyed yarns, fibres, buttons, sheep themed goodies, felted items, books, patterns, project bags, stitch markers,. Phew! We walked around, browsing each stall, making mental notes, fondling yarn and getting generally excited.

The first highlight for me was The Crochet Project. Kat Goldin and Joanne Scrace doing it for the crocheters - because crochet is cool! I bought a copy of their new shawl book, The Shawl Project,  which has 6 beautiful shawl patterns in and a section on how to design your own shawls. I had a fan girl moment with Kat Goldin - awesome crochet designer and author of Slugs in the Regfridgerator blog. Michelle also purchased the book and we are planning what to crochet first. (Reviews to come later)


It was great to finally meet Eden Cottage Yarns. Such beautiful colours and fibres. I completely forgot to go back for some DK yarn in bright pink and green - thank goodness for Internet shopping!!!

I bought a scrumptious skein from Easyknits - I love their colours. I picked something I liked but wouldn't normally go for. I even had it wound at The Teapot Trust stand so it's ready to use.


I also purchased this gorgeous yarn cake to but I can't remember the name of the stall.


Aileen Clark Crafts was there with her beautiful felt items. I couldn't resist these gorgeous felt sheep earrings.


I also bought buttons and a shawl pin, a yarn hair clip and a project bag and 5 mini skeins of yarn - I just couldn't resist the cuteness! 


We had also booked onto a crochet bird brooch workshop with Carol Meldrum. This was lots of fun and I learnt how to make linked stitches - I will be using this lots!

The venue was amazing - plenty of seating for eating your lunch, no queueing for toilets, great food and a bar (we may have partaked of a glass of vino!) Everyone was super friendly and it was great to meet Instagram and Ravelry friends. 

The journey home was easy, with lots of admiring of our purchases. 

On Sunday morning, I wished I was going again - my purse certainly wasnt! 

Maybe next year I'll stay for the weekend! 


Saturday, 28 February 2015

School Felt Project

I've come to the end of a fabulous week working in a lovely primary school in Euxton, Chorley.

I've worked with every child (around 200 of them) to produce 3 wall hangings to celebrate the schools 50th anniversary.

The design was very different to the school projects I've done before (I love a challenge!) Here are some photos showing its development over the week:


The three panels are now drying and, once dry, I will be stitching into them - there is sparkly thread involved!

I'll share some more photos once it's all complete.


Saturday, 21 February 2015

Needle Felt Brooches

This afternoon I had a fabulous time teaching 4 lovely ladies how to needle felt brooches.

We made use of cookie cutters, lots of merino wool tops and of course, sparkly bits (aka angelina fibres) to create gorgeous brooches. There was also a freeform fox and owl felted to.

We had plenty if time to play around and experiment and everyone left with a couple of pieces. Of course, we had biscuits, lots of warm drinks (the weather has turned a bit nasty here in Wigan today) and I'd even baked!

I can't wait for the next workshop! 

    My heart brooches - beading and embroidery to be added!

   Debbie's beautiful flower - I'm feeling Rennie Mackintosh!

    Michelle's gorgeous brooches
    Emma's owl and bunny modelled on her sons toy bunny! Super cute!

    Michelle's beautiful brooches including foxy!