Welcome


Welcome to The Gingerbread Bunny! I'm Sarah, a textile artist specialising in crochet and felt based in Wigan in the North-West of England.

On my blog, you can find my day-to-day craft adventures and tutorials.

You can find details of my work for sale and workshops on my website - www.thegingerbreadbunny.co.uk

Saturday 31 December 2011

Goodbye 2011, Hello 2012!

Photo courtesy of Ludie Cochrane via Flickr


It's that time of the year again when we reflect on what the past year has brought us and think about what we hope the New Year will bring. 

2011 has been a fantastic year for the Gingerbread Bunny.  It was the year that I launched my blog and my (very small) business.  I have enjoyed blogging much more than I initially thought I would and have shared my crafty work and connected with so many wonderful like minded people.  It has been amazing.

2011 was the year I taught myself some new crafty skills.  I learnt how to knit and crochet and I am truly a yarn addict.  (My current work in progress is a jumper!  I never thought I would be crocheting a jumper by the end of the year!)

2011 was also the year I taught my first ever crafty workshops and I loved it.  The feedback was great and I am really looking forward to teaching more in the future.

I hope that 2012 will see The Gingerbread Bunny continue to grow as a blog and as a business.  I am also looking forward to teaching more workshops and sharing my love of crafting with others. 

I have set myself 2 crafty resolutions;

To learn how to do Tunisian crochet.  I saw Holly (who has started a crafty blog - check it out) doing some Tunisian crochet and the final effect is gorgeous.  

I  also what to attend more workshops next year.  I have already enroled on the next Textiles course at night school for this term and am really looking forward to it.  I really want to go on a dressmaking course and definitley need to get myself booked onto another art journaling workshop at Art from the Heart in Harrogate!

Since Mr Bunny is working a night shift,  I will be seeing in the New Year on my own with my art journal and a glass of rose.  I will complete the final page in my 2011 art journal, reflecting on what the year has given me, and will begin my 2012 art journal, thinking about my own personal goals for this year. 
All that leaves me to do is to wish you all a Happy New Year.  See you in 2012!

Thursday 29 December 2011

Christmas Makes!

So it is over for another year: Christmas has been and gone in the blink of an eye and, if I'm being completley honest, I haven't fully recovered yet!  I love Christmas and was lucky enough to spend it with the people I love and care about most.  Plenty was eaten on Christmas day, lots has been drunk (and still is being) and presents have been given and received.

As you may remember, I was making quite a few of my gifts this year and now that they have been given, I can share pictures of them with you.


Some of the items I made!
I crocheted many pairs of fingerless mitts, hats and cowls, made a rag wreath heart for my aunty, a batik 'Socks in progress' bag for my friend (which I forgot to photograph) and of course there was the scarf of doom I knitted. 


Rag Wreath Heart

I also put together some crafty gifts, mainly some gorgeous hand spun and dyed sock yarn to go with the sock bag and I bought my mum some beautiful sparkly yarn to crochet with.

The Christmas cards I made have been admired and commented on by the lucky people who received them (check them out here).

I to received some lovely crafty Christmas gifts including some homemade blackberry vodka, homemade fudge and Kirsties' new craft book.

Saturday 24 December 2011

Happy Christmas!

Today is Christmas Eve and I am spending the day making last minute preparations for Christmas! Mince pies are baking in the oven, the Christmas Cake is waiting to be marzipaned and iced and there are still gifts to be wrapped and cleaning to be done!
Tomorrow morning I will be off to church and then I will get to open my presents and then start to cook Christmas dinner with a cheeky glass of mulled wine!
So all that leaves me to do now is to wish all my followers a very merry Christmas! I hope you all have a great day and that Santa brings you some fab crafty gifts!

Tuesday 13 December 2011

Keeping the troops warm!

Sometime in October I answered the crafty call of Louise from Caithness Craft Collective (check out her fabulous podcast if you haven't already done so) to put my crochet to good use; making hats for the troops in Afghanistan.  This project had been born by a lovely lady on the Isle of Man, who, if I have my information right, is related to someone currently serving out in Afghanistan. 

So I got out my hook and my yarn and began to make my hat.  I posted it to the Isle of Man and, feeling rather pleased with my efforts and with a slightly more shiny halo than usual, forgot about it!  I had done my bit.

Fast forward to 2 weeks ago now and the arrival of a bluey (a letter used by the armed forces to send mail overseas) through my door.  Mr Bunny was at home that day and text me, rather worriedly I think, to say this bluey had arrived.  I spent most of the day wondering who it could be from.  Once I got home I discovered that this particular letter was from one of the soldiers who has received our hats thanking us for making them. 


How lovely is that?  I didn't expect anything but to receive anything but to know that our efforts are appreciated is amazing.  It reminded me of the importance of saying thank you when someone does something for you and, if a soldier serving out in Afghanistan can say thank you then I definitley can!

Saturday 10 December 2011

Wonderful Workshops!

Tribal Bunny and Mum
I'm back!  The past few weeks have been manic with Christmas shopping, making and festive frivolities!  You may recall that a few weeks ago I was off to the Tribal Sleepover in Huddersfield to teach some workshops, eat cake and dance!! Today's post is all about what was an amazing weekend.  The Tribal Sleepover took place at the most beautiful Victorian house in Huddersfield and belly dancers from across the country came together to dance, drum, eat cake and be crafty.  The whole weekend was amazing and I taught my first ever crafty workshops; Feathery Hair accessories and Art Journaling for Dancers. 

We (my Mum and I) arrived on the Friday night and were greeted with cake, always a good start to any weekend I think!  In the evening I taught 2 lovely ladies how to crochet.  I have to say that they did extremley well and picked it up very quickly.  I think they are hooked!


Saturday saw my Feathery Hair Accessories workshop.  I had around 13 lovely ladies on this workshop and they produced some amazing clips and hairbands to wear whilst performing (I even saw one being worn at the hafla (show) on the Saturday night!)  There where plenty of feathers for people to choose from and sparkly bits to decorate the clips with. 


One of the beautiful hair accessories made on the workshop!

Look at what we made!!!

On the Sunday I taught Art Journaling for Dancers.  There were around 12 of us playing with paint, stamps and spray inks and some beautiful journals were begun.  Some of the ladies are now addicted to art journaling and have been out and bought more resources to journal with!


Busy, busy

I love this page
Sharing my love of making through the teaching of these workshops was amazing!  The feedback I have received from the individuals on them and from the fantastic organsiers, Asif and Pauline, has been great!  In fact, I have been asked to teach at next years Tribal Sleepover! How great is that?

Friday 25 November 2011

Belly Craft!

This weekend is a rather exciting one and I am writing this post while I wait for my Mum to arrive so we can drive over the Pennines to Huddersfield in Yorkshire! We are off to The Tribal Sleepover hosted by some wonderful bellydancer teachers and I am teaching! Squeal!
It is a weekend if dance, drumming, craft, cake, chilling out and drinking (vodka in my case!) Earlier this year I was asked if I would teach some crafty workshops and I jumped at the chance! It is a great opportunity for me to develop this part of The Gingerbread Bunny, which I really want to do as, well, I am a teacher!
So, I am running a crochet-a-long later tonight making zill muffs and flowers, tomorrow I am teaching a feathery hair clips workshops and on Sunday morning it is all about the art journaling!
The bags are packed and the car is ready to go. All I need now is my partner in crime!!!

Thursday 17 November 2011

Embroidery and Cross Stitch

A few weeks ago (yes I am behind with my blogging updates) we learnt about embroidery, the use of coloured threads to create decorative needlework through designs and pictures onto fabric done by hand or machine.  There are many absolutley amazing examples of embroidery dating as far back as the Iron Age and the Zhou Dynasty in China! 

There are a wide range of stitches used in embroidery and I learnt only a handful of them!  I could already do running stitch, back stitch and blanket stitch (an impressive range I know?!) but by the end of the lesson I could do the gorgeous sheaf and fly stitches as well as a french knot!  Now hand embroidery is something that I haven't really attempted before. I am a fan of speed, being very impatient, and so favour sewing by machine rather than hand but there was something so relaxing and calming about sitting with my embroidery hoop, like a Tudor lady, experimenting with the various stitches.  I have to say, I quite enjoyed myself! 


My Stitches

I also learnt about cross stitch and how the same stitch has to go at the back each time.   I had a go at this as a child with very little success but am pleased to say that I cross stitched, for what seemed like an eternity, my very small  heart and ABC! 


Not to scale! (It is much smaller in real life!)
Kirstie's Handmade Britain is currently being shown on Channel 4 (If you haven't been watching it you need to get on 4OD and watch all the back episodes - I have watched each one at least twice!)  In one episode Kirstie made the most amazing applique and embroidered cushion for the Great Yorkshire Show competition which she won!  After learning embroidery and applique, I really admire Kirstie's determination and patience with her cushion.  Hand embroidery is not for the faint hearted - it takes real commitment but the end results are so worth it!

As for me?  Hand embroidery is a craft I will be using as and when I need.  I am, however, desperate to try my hand at machine embroidery.

Saturday 12 November 2011

Giveaway!

Just a quick post to let you all know about the very exciting giveaway I am having over on my Facebook page (www.facebook.com/gingerbreadbunny)
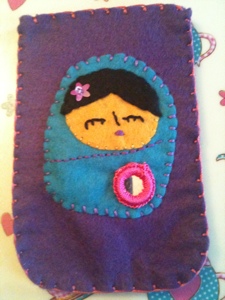
Up for grabs is a custom made mobile phone/gadet case (here's one I made earlier below!) in a colour and design of the winners choice. All you have to do is hop over to my Facebook page, like it and follow the easy peasy instructions on the giveaway post on the page!
So, what are you waiting for? Get on over there!

Sunday 6 November 2011

C is for Christmas Cards

Christmas is getting nearer (49 days away infact) and I am well under way with my preparations.  I have to say I am surprising myself with my organisation this year and hopefully I will be able to avoid the dreaded Christmas Eve shopping for last minute gifts.

This weekend has been all about card making (and re-doing the Christmas cake!) A few months ago I decided that I wanted to make some applique christmas cards for my friends and family and, after seeing a few ideas in magazines, decided on baubles with a jewel colour theme which is the colour scheme for my wrapping this year.

My completed Christmas cards
I started by making the baubles.  The first two I made I actually stitched the bauble onto the snowflake print fabric but then had the idea of actually making the bauble dangle so that it could be removed and used as a decoration.  I attached, using fabric glue, some pretty festive ribbon I picked up for a really reasonable price in Lidl, across the middle and used some thinner ribbon to make a bow and dangle for the top.  To finish it off, I blanket stitched around the outside in a contrasting fabric.


I then cut a piece of christmas fabric (mine is a turquoisey teal snowflake print from Abakhan) and then a pieice of felt slightly bigger.  I attached this to the card base using the sewing machine which was so much fun.  I have never sewn onto card before but it is great!  I didn't worry too much about it being really neat and central.  Finally, I carefully stiched round the ribbon to attach it to the card.


Although it took quite a bit of time, I think it is well worth the time and I sure my friends and family will love receiving these this year!

Monday 31 October 2011

Happy Halloween

Just a quick post to wish you all a happy Halloween and to share some crafting. Not mine but Mr Bunny's! He has been busy carving his pumpkin and wanted me to share it with you all!

Sunday 30 October 2011

All about applique

I am a little bit behind on my textile course updates!  (Ooops - sorry!)  Being half term, my class hasn't been on this week but I am looking forward to learning all about trapunto quilting tomorrow night.  So far we have covered rag rugging, applique (the subject of today's post) and embroidery and cross stitch.  I have to say that I am really enjoying the course and have learnt lots of new techniques, met some fabulous people and have been truly inspired.  One aspect of the course that I am finding really useful and fun is keeping my themed sketch book and I will definitley be applying this strategy to my crafting at home.  It is just such a great way to store ideas and inspiration.


So, on to applique!  Applique is the craft of sewing, or attaching, one piece of fabric to another. The word applique comes from the French, appliquer, which means to put on.  It is a technique which is believed to have been around since people could sew and quite possibly began as a way of patching holes up in clothing.  One of the earliest examples found was in Egypt depicting a ceremonial canopy.  Today applique is a very popular technique used to decorate all manner of items by adding shapes and pictures in contrasting fabrics to the base. 

We learnt the quick and easy way to applique using bondaweb and it is just fantastic!  In class I appliqued a very simple tree shape and it worked really well.  I have also made my bellydancer phone cases from felt, appliquing (is this a word?) the bellydancer onto the base cover.  I don't use bondaweb for these as the felt 'sticks' to itself and doesn't move around when sewing. 

My (very simple) applique tree

I really enjoyed applique and am planning on using this technique to make some Christmas cards for friends and family.  If you haven't given it a go, I really suggest you do!

Monday 24 October 2011

Christmas Rag Wreath

Colonial Christmas Wreath courtesy of Wormwood_3 on Flickr

Christmas wreaths can be dated back to Roman times and traditionally are seen in Catholic churches during Advent, lighting candles to countdown the Sunday's to Christmas.  I have alwyas loved the wreaths that you see on peoples front doors, all bright and festive with pine cones and fir leaves, but have never been able to have one on my front door as it opens onto the road and I just know it wouldn't last 2 minutes! 

You may recall a few weeks ago I learnt how to rag rug in my night course.  The following week we all shared our work and one lady had created the most gorgeous rag wreath for Christmas.  I absolutley loved it and knew that I wanted to make one to hang in my house as a decoration so I asked her how she had made hers.

To make mine I have used the inside section of an embroidery hoop for my base ( which I bought this for £3.10 from Abakhan)  but you can use any circular base, even an old wire coat hanger bent into shape. 

I then cut my chosen fabric into strips the same length and width using pinking shears to create a pretty, unfrayed edge.  I had to test out a few strips to get the correct length first.  I used 3 different colours which match my Christmas tree and decorations.  The teal fabric is from a set of curtains I bought in a charity shop which have been in my fabric stash for ages, the purple is left over fabric from another project and the pink is from the skirt of my wedding dress! (I got married at Christmas so this is a really nice way to reuse it)

Next I tied the strips of fabric round the hoop, pushing them up next to each other tightly to get that really full effect.  I made sure all the knots where on the same side (the back) to get a really neat finish to the front.  This took me about an hour to do and I randomly grabbed strips rather than having a set pattern to it.

I chose to make a dangle for in the middle of my wreath although you don't really have to!  My dangle is a felt star with a shisha mirror in the middle and then beads stitched on to add a little bit of festive sparkle. 


My finished wreath
 I really enjoyed making the wreath and it is a quick, easy and really effective decoration for Christmas.  I can't wait to put my Christmas decorations up so that I can admire it!

Saturday 22 October 2011

Holiday Happenings!

Half term has arrived!  Hooray!  This half term has been really busy and I don't feel that, on the crafty front, I have managed to get much done so I have lots of crafting planned for this week to make up for it.  Today's post is going to be a quick catch up on what I've been making and what I have planned for the week ahead.

I am still (yes still!) working on my Grandad's knitted ribbed scarf for Christmas.  It is getting there and I am optimistic it will be finished in time (it's a good job I started it back in summer!)  Hopefully, I will get a few more Christmas pressies started this week as there are only 9 weeks to go!

On the topic of Christmas, this week will see the start of some fabulous Christmas card making, a rag rug style wreath for my door and the dreaded Christmas cake.  Last year's Christmas cake was something of a disaster and it ended up in the bin - I do not plan on repeating that this year - and I had to buy a pre-made one from the supermarket which I marzipanned and iced myself.  I'm going to try Delia's recipe this time round which I have heard is really good.
 
Since the craft fair, I have recieved lots of orders for my handmade goodies.  Last night I delivered two handmade hair accessories for two gorgeous dancers and this morning I completed 2 other orders for finderless mitts (my own design!), flower brooch and a flower pencil topper.  I am off to purchase some more wool, including some Debbie Bliss Cashmerino, for some mitts and a hat later on this week.

This morning I started a crochet project for me!  I see many photos of the knitted baktus shawl and have always loved it so I googled crochet baktus shawl and found a pattern.  I am using a beautiful hand dyed yarn I bought from The Woolclip (there is a trip planned for Friday) as I only have 1 ball of the yarn.  The baktus is a great project for those one off hand dyed balls of yarn!  Not only is it a really simple pattern but it shows off the colours in the yarn beautifully. 

I am definitley keeping myself busy this week - keep popping back to see my finished items!

Saturday 15 October 2011

Diary of a Craft Fair Seller

Me and my stall.  I know the banner is a bit wonky but if I'd complained
I think Mr Bunny would have taken the scissors to it!

The day finally arrived today - my first every craft fair as a seller and not as a customer!  This fair has been in my diary since earlier on this year and, rather nicely, it was held at the primary school where I work meaning I knew lots of people and the atmosphere was very friendly and relaxed.  I have to be honest that yesterday I was worried that I would not sell anything but, you will be pleased to know, I sold many things and people even placed orders!

Preparing for the craft fair has been a long and time consuming task.  Making plenty of items to fill the stall, pricing up and preparing my table has taken up most of my spare time for the past month or so.  I had a really clear image in my mind of what I wanted my stall to look like and I was really pleased with it.  My table covering came from Abakhan, the banner was from Vistaprint (free!) and I decorated boxes and a picture stand to co-ordinate.  I am also one of those people who likes prices to be visible so I made sure everything had a price on or near it.  Knowing what and how much to make was tricky to but today has helped me to see the sorts of things that sell well and what to have plenty of in the future - I have come to the conclusion that I need a good range of prices and plenty of the lower priced items. 

This morning I arrived nice and early to set up.  Luckily Mr Bunny had volunteered (??) to help and so he tied the banner up whilst I did the pretty things.  I'm glad I left plenty of time to set up my stall as, despite setting it up on the dining table at home as a practise, it still took me a while to decide where things should go. 


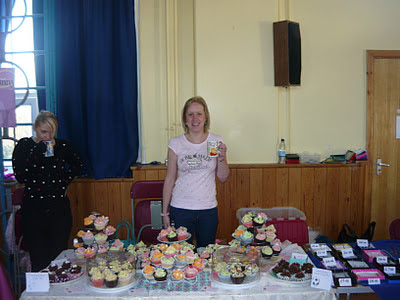
The Cake Queen!  Sarah's cupcakes are delicious -
check her out on Facebook!

All in all the day was a success.  Being in a room with lots of creative people (and gorgeous cupcakes) and having the opportunioty to talk about my crafting was great. Listening to people comments and getting feedback on my items was great.  There where lots of positive points to take away and I am really looking forward to my next fair!

Wednesday 5 October 2011

Rag Rugging

Textiles photo courtesy of jeni rodger via Flickr
This week I started an evening class.  I have been searching for an arty course at night school for ages and, at the start of September I was most excited to find that a local high school was offering a 10 week textiles course. Squeal!  So I enrolled and this week saw the start of the course (last week was all about the paperwork!)  Each week I plan to share what I have learnt and any work I produce.

As part of the course I have to choose a theme and keep a sketchbook to inspire my final project, which I have yet to decide on.  After much thought I have chosen trees as I just love them.


This week we learnt about the traditional British craft of rag rugging.  Rag rugging is the process of using strips of fabric, usually old clothes or oddments of fabric, to make a rug using a variety of techniques. 

In Victorian times rugs would be made from old clothing, usually out of necessity to reuse what they had.  These would move around the house until finally they had fallen to bits.  This is why there are very few examples of old rag rugs today although evidence has been found of rag rugs being made and used in Celtic and Viking homes.  It was in America, most recently, that rag rugging was recognised as an art form and now the techniques are used to create not only rugs but cushions and even jewellery. 

There are many different techniques used to rag rug, many being specific to certain parts of England, but generally these are either hooked and prodded.  The hooked technique uses a long strip of fabric and a hook, for example a crochet hook, to hook the fabric through the holes of your base fabric creating a lumpy, bobbly texture.  The prodded technique involves using much smaller pieces of fabric and then poking them through the holes, creating a shaggy texture to the rug.  In the north of England proddy tools where often made form an old dolly peg with one leg sharpened.


Pages from my sketch book.


I think rag rugs are beautiful and Kirsty's Homemade Home TV series inspired me to try out rag rugging using the proddy method.  However, I didn't really like the technique or the effect that I got when I tried it and so abandonded it.  Learning the hooky method has re-inspired me to get rag rugging again- I love it (probably because it is very similar to crochet!)  

My sample for my course is a very simple tree made using 4 different fabrics, to see what effects they would create, and using both the proddy and the hooky techniques.  I am really pleased with the final result. 

My rag rug tree

I am so pleased that I enrolled on the course and am enjoying it so much.  Next week is applique and I can't wait!

Saturday 1 October 2011

A great day out!

What a great day I have had! Given the impromptu heatwave we are currently having in the UK, me and Mr Bunny decided to make the most of it and have a day out to the Lake District. We love the Lakes and usually go to all the touristy places, like Windermere and Keswick, but today we decided to visit some places we haven't been to before, some of them very crafty indeed!

First stop was The Alpaca Centre at Penrith where we got to go and look at the alpacas and miniature donkeys. Next we took a gorgeous drive up to Caldbeck (more about that later). Our final stop, before a rather scenic drive home, was to the beautiful town of Cockermouth where there is a lovely little art shop and plenty of ethnic and handmade shops!

So, onto the main topic of today's post! The village of Caldbeck is north of the A66 between Penrith and Keswick. The drive, once you leave the motorway, is beautiful and the village has a couple of cute crafty type shops as well as a pub.

The main purpose of our visit to Caldbeck was to visit The Woolclip. I first became aware of them at Woolfest as they are the fantastic organisers and had a big presence there. It is a co-operative of women who have skills in knitting, crochet, spinning, felting and other textile crafts. You can find out more about them on their website www.woolclip.com

The shop is situated at Priests Mill, an old water mill, and it shares the building with a fabulous cafe, silversmith and collectables shop. The setting is gorgeous, right next to the river, and they have even yarn bombed the trees! Mr Bunny is now demanding a crocheted spiders web for the house!

The shop is amazing. The original mill features have been maintained and the it has a welcoming and friendly feel about it. You can buy ready made items, such as shawls and socks, as well as the materials to make your own. There is a great range of hand spun and dyed wool in all weights, tops for felting, hooks and needles (some handmade), buttons, drop spindles, books and all manner of other fripperies!

Obviously, I couldn't go all that way and leave empty handed! I bought some beautiful hand dyed kid mohair in purple and turquoise, some 'smidgens' of hand spun yarn and tops for felting, that may come in handy for my textiles course, and the pattern for the spiders web!

It really is a great place to visit. It has great quality items and promotes wool and the handmade. I love the way that like minded women have come together, supporting each other, to create something so wonderful and beautiful and that really does need to be supported!

Saturday 24 September 2011

Customisation, customisation, customisation!

Today I got up to a bit of impromptu crafting of the customisation kind!  Whilst in the new Abakhan store in Bolton last night (it is amazing!) I picked up some 3D textile paint.  I have had a blank canvas bag for ages, which I picked up for 99p in Hobbycraft, and just haven't gotten round to doing anything with it.  So, this morning I customised my bag all ready for taking my things to my textiles night class which starts on Monday.


I got bitten by the customising bug and also jazzed up the cover of my sketch book to! 


If you fancy customising something you have lying around, then read on !

You will need:
An item to customise
Some 3 textile paints (Available from the Range or any other art and craft shop)
A felt tip pen or fabric pen/pencil

How to:
1.  First, make sure the item you wish to customise is clean and dry.

2.  If you want to, use the felt tip pen or fabric pen/pencil to sketch out your design.  I started doing this and then got fed up and just went for it ~ this acheived a more random, doodley effect.

3.  Carefully, go over your sketch and apply the paint.  Be careful not to smudge it as you do (I had an accident and smudged some of mine and had to reinvent some of my design!)

4.  Leave it to dry for 12 hours!

When complete you will have a gorgeous customised item unlike anyone elses!

Wednesday 21 September 2011

Just checking in!

Hello lovely followers of my blog!  I hope you are all well and have been getting up to lots of craftiness.  I have to say, I haven't been since going back to school after the summer holidays.  Mainly I have been working on 3 projects, a knitted ribbed scarf for my Grandad for Christmas (yes, this is the one I began back in July!) and 2 crocheted shawls as well as making for a craft fair.

The scarf is getting there and, to be honest, there isn't far to go.  It is currently my driving to dancing, waiting for the dance lesson and lunch time knitting project.  Little and often seems to be working for me as it is a bit repepitive and, with my inability to concentrate on one thing for long, a great way to actually get it done.  It may be finished for Christmas yet.

The 2 shawls are slow, slow progress.  Both are crocheted, 1 being the lovely frill shawl I posted about recently and the other a gorgeous zig zag pointy shaped shawl.  I have decided to concentrate my efforts on the frill shawl, as I am nearer to completion with it, and I am pleased to say that the main body is pretty much done and I will soon be ready to start the frilly edge.  Yay!  The zig zag pointy shawl I am crocheting in King Cole Riot, which is a gorgeous variagated yarn, is very slow progress as it is worked in double crochet and in DK weight yarn.  I am determined to get it finished as it is just so beautiful and will look great in winter (this one, not next)!

Last weekend a lot of my crafting was devoted to making for a craft fair which the PTA are holding at the school I work in in October.  I have been busy crocheting mug hugs and have even designed some fingerless mitts to sell as well.  They now need buttons adding to fasten but are looking great.  Once complete I will post some photos.

You will be pleased to know that there is much more craftiness to come; I start my textiles course at night school next Monday and have a trip to the new Abakhan in Bolton planned for after school on Friday as well as getting more done on my shawl and finishing those mug hugs for the fair.  If only there where more hours in the day!!

Wednesday 14 September 2011

Seven things about me!

If you read my last rather self indulgent post, Me Me Me, I mentioned that I was the very lucky receiver of the Irresistibly Sweet Blog Award from the gorgeous Ali of the Random Wooliness blog (I love that name!) 

Ali has informed me that I now need to tell you seven things about me (which you might or might not already know) and then I am to nominate seven blogs to pass the award onto! 

Seven Things about Me

1.  I used to be an Air Cadet and learnt how to fly a plane amongst other exciting things. 

2.  When I am not crafting I am a tribal bellydancer.

3.  I love to read children's books because they are so well written.  Harry Potter, The Spooks books and the Alan Garner boxset all feature on my bookshelf.

4.  I am a primary school teacher and currently teach Year 6 (that is top juniors to any one over 25!)

5.  I once stood next to Victoria Beckham in Mango in the Trafford Centre.  I was so shocked that I just walked out of the shop quickly and stared through the door at her.

6.  As a teenager I attended a science day at Edge Hill university where I discussed forces with Johnny Ball (Famous TV kids scientist and father of Zoe Ball!)  I also met my now best friend there to!

7.  I was once a regional finalist in Junior Master Chef (and I have the certificate to prove it!)

So, there you have it, seven things you may or may not know about me!

Passing the award on!

As per the instructions, I am now to pass the award onto seven deserving blogs.  Now then, if I pass it on to you there is no pressure to do anything - you may just bask in the glory of your award!  The following blogs are ones that I love and which I really think are worth you taking a look at!

1.  Shinybees 
Shinybees, who is now living in deepest darkest South Africa, writes a really fab blog all about her crafting.  Her posts often make me laugh out loud and are always informative!

2.  Random Wooliness
I am going to pass the award right back to you.  Not only do I love the name but I love the blog.  Ali writes about felting, a craft I'd love to try, and her blog is well worth a look!

3.  Expressive Souls
The lady who introduced me to Art Journaling.  Indigo (AKA Tracy) writes very openly and beautifully about her art journaling journey.

4.  iMake
Not only does iMake have a fabulous blog about all manner of crafty things, but she also podcasts!

5.  Julia Crossland
A gorgeous arty blog with amazing posts that really get you thinking and remind you that you aren't the only one who struggles with your creativity at times.  Julia also began and runs the fabulous Being Creative project.

6.  Dyan Reaveley
Dyan is the owner of the beautiful Art from the Heart in Harrogate, is a designer of beautiful stamps and journaling goodies and has even been on QVC!  Her blog is full of inspiration.

7.  Tribal Pilgrims
In a way it is kind of giving myself an award as this is the blog of my tribe, Sakura.  However, i don't actually write the posts (in fact I haven't written any), they are written by my tribal partner in crime, my Mum.  If you want to know more about tribal bellydance then hop on over!

So hopefully, you have now discovered at least 1 new blog to follow!

Saturday 10 September 2011

Me, me, me!


Hello to you all whether you are an existing follower of my blog or a new one (becuase I think I have acquired some new followers this past week!)

What a week I have had - and for great reasons!  So I have to warn you that, in the words of Louise from The Caithness Craft Collective podcast, this post is a bit ME ME ME!!!

Last weekend I was involved in the Art from the Heart bloghop to celebrate their 10th birthday (which is this weekend - Happy Birthday!)  Art from the Heart is my favourite art shop ever.  It is a good hour and a halfs drive from where I live, located in Harrogate in Yorkshire.  They sell the most amazing art and craft supplies and host fabulous workshops in art journaling amongst other things.  I am off there tomorrow morning, very early, for a gorgeous taster workshop with Dyan and maybe to spend some pennies!  So anyway, back to the bloghop, I signed up for it thinking it would be fun.  I was allocated to the 7 Gypsies team and so had to make anything using 7 Gypsies products, photograph it and then share my project in my blog hop post.  What fun!!! So, I made my journal page, filled in the template and set my post up to publish at 10am on Saturday morning.  Good, mission accomplished! 

Now, if you comment on my blog it has to be moderated before it goes live.  I check my iPhone and I have 6 comments to be moderated.  Ooooh, thinks me, how lovely!  However, it didn't stop there and I soon realised that this blog hop thing was going to be much bigger than I ever imagined.  To cut a long story short, I currently have something like 80, yes 80, comments on my bloghop post and, last Saturday, my blog was viewed 695 times!  I still cannot believe it - how amazing!!

So, after that most exciting event last weekend, my Craftseller magazine arrived.  This is a new magazine that is all about selling your crafts.  It is really good, has some great advice in it and projects that you can make and sell.  I got issue one back in May and made some little babushka dolls (you can find them in one of my past blog posts).  I joined the Facebook group and posted a link to my blog post about them (I like to share!) and that was it.  Until I received an email from a lovely lady at the magazine asking me if I wouldn't mind them featuring my dolls on their letters page.  So Issue 2 arrived on Thursday and I am in it, it is small but it counts.  I will also let you into a little secret, but I may be featured again in a future issue.  Squeal!


Me in print
 Now, you may think that that is enough excitment for 1 week, but no.  This morning I woke up rather early and was checking up on all the blogs I like to follow.  I was reading the lovely Random Wooliness blog by the gorgeous Ali, and her latest post, Seven things about me! is all about The Irresistbly Sweet Award she has received from another blog.  How gorgeous it was to read the post and then find that, as part of the award, she has to pass it onto 7 others and I am one of them!  Overwhelmed!  Thank you Ali x

Also this week, yes there is more, I have been asked to teach some workshops and to guest blog on another blog. (Slowly but surely I am taking over the World!)

I have to say that when I started to blog I never imagined that any of these things would happen, but it sure feels great that it has!  Blogging is a fabulous way of meeting like minded people and I have met so many.  So, whether you are an exsisting follower or a new one, thank you for stopping by and making my blog so special! 

Saturday 3 September 2011

Art from the Heart 10th Birthday Blog Hop!!

Welcome to a very exciting blog hop in Celebration of 10 years of Art from the Heart!


Lots of exciting things are happening at Art from the Heart next weekend where the big birthday bash is taking place. Want to know more? Then do click here!

 
So, in celebration we are having 5 birthday blog hops.
You should have reached my blog from here, Dyan's blog, and are on the 7 Gypsies hop.

Here is my project!

It is a page from my Art Journal.  I used:
  • A 7 Gypsies sticker from the 'Gypsy' sheet
  • The gorgeous Sabadell paper (it is brown spotty on one side and blue and white stripey on the other) from the Barcelona papers range
  • My fabulous 7 Gypsies stamper which has 12 word choices in fancy fonts
  • The base is a 7 Gypsies card from the Vintage journal pages set
  • A range of acrylic paints applied with cards and baby wipes, black stamping ink and round bottle tops to create the circles.
 Before you move on, you will need to collect a letter from me which is

N
This is part of an anagram of a 7 Gypsies product.
Once you get back to Dys blog please email your answer to Ben.

So, after leaving me a comment, you need to move on to

Have fun hopping!

Thursday 1 September 2011

Being Creative ~ Travel!

It is that time of the month, time to share my project for this months Being Creative theme of travel.  Now I am going to be honest, I have literally made this in the last 3 hours since I got home from my first day back at work.  Ooops!

Now I love to travel.  I adore long car journeys and train journeys and coach journeys and, well, just about any journey really.  Only this week, me and Mr Bunny went on a very long car adventure which took us over the Humber Bridge (we do these adventures quite often, the most famous being a trip to Ikea in Warrington which turned into an adventure to Oxford when we decided not to get off the motorway!)

So, here it is, my journal page all about travel.


Tuesday 30 August 2011

The end of summer!

Well, it is here, the end of the Summer holidays (not that we've seen much of the summer).  On Thursday I go back to school and have my pencil case and new school bits 'n' bobs ready to go and have planned lots of exciting lessons to teach my new class.  The start of the new school year is really my New Year, it's a new start, a new class and new lessons and it is quite exciting.  It does, however, mean that there will not be as much time for me to craft and, once again, I will have to squeeze it in during my dinner time and whilst catching up on my favourite TV programmes at night!

The start of the new school year is also a sign that autumn is on it's way and it is nearly time to get the wooly's out - cardigans, jumpers, hats, mittens and scraves!  Hooray!  It is heaven for knitters and crocheters as we can finally wear all the items we have been making during summer. 

I recently bought the Complete Guide to Knitting and Crochet by Nikki Trench after it was recommended to me by a friend.  It is a great book and has lots of information on the history of knitting and crochet, yarn, basic stitches and more complicated ones as well as a good number of modern patterns. 


I have already crocheted hats (one for me in Noro Silk Garden and one for a Christmas present) and am currently working on the Frill Shawl in a gorgeous teal King Cole Haze Glitter.  I have plans for other projects in the book to!  It is well worth getting and I bought my copy for £1.51 on Amazon and I have seen it in Asda and The Works to.  


I can't wait to wear my hat!
Blog Hopping
This coming weekend, 3rd September,  I am involved in something rather exciting in the blogging world - my first blog hop!  All I am going to tell you is that it is all linked to Art from the Heart's 10th Birthday celebrations and includes a bit of a competition.  Check my blog on the 3rd of September from 10am for more exctiting details.    

Sunday 21 August 2011

The dreaded 'C' word!

The dreaded 'C' word has been popping up on Twitter and Facebook this week!  As the summer holidays draw to a close (not that we have seen so much of the summer) some of my favourite crafty magazines have been asking their loyal readers what they want to see in their Christmas editions.

But it's only August!!! I hear you all cry at the computer. And I feel exactly the same.  I hate it when the supermarkets begin to stock their festive ranges in August and, on a recent trip to a local crafty/homeware/vistor attraction, was riled to see them announcing the arrival of a mystery man (the display consisted of a dressed up mannequin, wearing a red suit surrounded by wrapped up boxes and snow sporting a large cardboard box with a question mark on it!  Can you guess who it is?!) 

Now don't get me wrong, I am no grinch and I absolutley LOVE Christmas, but I like it to start in December and be 4 weeks of excited preparation.

However, when you have handmade goodies to make for gifts, you need a little bit more that 4 weeks to make it all.  And so this week I started to think about who I was, and wasn't, going to be handmaking gifts for this year and what I was going to be making.  I have narrowed down my decision making to three key questions to ask yourself when handmaking gifts for Christmas.


Box with Gift courtesy of Robo Android on Flickr

1)  Will the recipient appreciate it?
I am not going to spend my time knitting/crocheting/sewing for someone who doesn't really appreciate it.  Now this doesn't make them a bad person, it just means they don't get it!  For example Mr Bunny actually said to me yesterday 'I don't want any handmade stuff for Christmas!' He is very supportive of my crafting and can see that lots of people appreciate it but, he doesn't want.  So therefore, Mr Bunny and a few other people will be getting money for Christmas this year.


Clock courtesy of wiwin.wr on Flickr

2)  How much time have you got?
I am knitting one scarf for Christmas this year and I have already cast it on.  I know that it will probably take me until Christmas to complete it so I have started it now.  Most other people are going to be getting small, quick items probably knitted or crocheted.  Mitts and hats are great for this as they knit/crochet up quickly. 


Money courtesy of Community Friend on Flickr

3)  How much will it cost?
For me, this is an important factor.  I do not have, as Mr Bunny often reminds me, a £50 tree in the back yard (although I wish I did).  So I don't want my gifts to cost too much in money.  By making smaller items, such as mitts and hats, you can afford to invest in a nicer ball of yarn as you won't need as many!

I have indeed asked myself these three questions and have drawn up a list of recipients, gifts and in some cases yarn (a good excuse for a yarn destash!) that I will be using.  Some may say my list is a bit ambitious and I do have a backup plan if I run out of time (Gift vouchers are wonderful aren't they?!) but I am determined to get these made and the sooner so what am I still doing here?  I have Christmas presents to make!

Monday 15 August 2011

Keep calm and drink tea!

Photo courtesy of nicasaurusrex on Flickr
There is nothing better than a good cup of tea.  In fact, we Brits are well known for drinking copius amounts of the stuff.  The first thing we do when someone visits is to put the kettle on and 'brew up', making everyone a nice, refreshing cup of tea (and if you're lucky, there is often a scrummy biscuit to go with it!)  Even when faced with a crisis, there is always someone on hand to offer you a cup of tea because, quite frankly, a cup of tea solves everything!

As you are probably already aware, last week we witnessed some of the most appauling behaviour from a minority (and I emphasise that it was a minority) of citizens, as they rioted, looted and quite frankly made a right show of themselves, across the country.  In the face of adversity, there were, as only we could have in Britain, people on hand to offer our police officers a good cup of tea (all be it served on the back of a riot shield) to show their support for the very difficult job they had to do.


On Facebook, a group was started to encourage us all to calm down and drink a cup of tea. 

So, this brings me onto my crafting.  In the most recent issue of Inside Crochet there was a pattern for a magnificent tea cosy designed by the amazing Aoibhe Ni (I adore her patterns).  It was unusual, funky and quirky and so I knew I had to make it.  I raided my stash and found the perfect wool, as it needed to be one that would felt, and set about to make the tea cosy.  It had it's outing at the Stitch 'n' Bitch I hosted with my friends (my Mum, Jo and Jan) last Friday, and was admired by all. 


Inspired by making this tea cosy, I decided to have a go at desigining and making one of my own, and this is what I came up with;


It reminds me of a swimming cap from the Seventies!

Saturday 13 August 2011

How to crochet a Granny Square!


I love granny squares!  They are traditonally associated with the seventies when pretty much everything that was crocheted was a granny square.  This has led to the poor granny square being labeled as out of date and a bit naff.  However, granny squares can be so gorgeous and beautiful and make great blankets and bags whilst also being really easy and quick to make.

This tutorial has developed really for my friend, Jan, who at my recent Stitch 'n' Bitch asked me to teach her how to crochet a granny square.  So we sat down together and worked through one slowly and then she had a go on her own.  She took home my finished square to refer back to and I was going to email her the written pattern for a basic granny square but, sometimes things make much more sense when there are pretty pictures to show you what to do!

So, here it is.  My guide to crocheting a basic granny square.

How to Crochet a Granny Square

Chain 6


Join the chain with a slip stitch into the first stitch to make a ring


ROW 1

Chain 3 (This counts as the first treble stitch)


The next stitches are going to be worked into the ring not into the stitches.


We are going to start to make the square shape - 4 sides so 4 sets of stitches!
2 trebles, chain 1
3 trebles, chain 1
3 trebles, chain 1
3 trebles, chain 1


Join to the 3rd stitch of the chain 3.


So now you can see a square emerging. The 3 trebles make the sides of the square and the chain 1's make the corners of the square!

ROW 2

Slip stitch into the first chain 1 space


Chain 3 (This counts as the first treble)

Still working in the same chain 1 space;

2 trebles
Chain 2
3 trebles
Chain 1


Working in the next chain 1 space;

3 trebles
Chain 2
3 trebles
Chain 1

Repeat this set of stitches in the remaining 2 chain 1 spaces.

Join to the third stitch of the first chain 3 in this row with a slip stitch


ROW 3

So now it should be really easy to see the square shape and to spot the corner chain 2 spaces and the side chain 1 spaces. 

Slip stitch into the first corner chain 2  space.
Chain 3 (The first treble in this corner)

Working in the same chain 2 space;
2 trebles
Chain 2
3 trebles
Chain 1

SIDES
Working in the next chain 1 side space;
3 trebles
Chain 1

CORNERS
Working in the next chain 2 cornber space;
3 trebles
Chain 2
3 trebles
Chain 1

Repeat the sides and corners instructions above in the remaining spaces.
Join to the third stitch of the first chain 3 in this row to join.


And there it is, your granny square!  Now this is a really basic granny square but is so beautiful. 

To change the size of your square, just change the size of your hook or the thickness of your yarn.

For a multi-coloured square, fasten the yarn off at the end of the row and change your yarn colour at the start of the next row (slip stitch the new yarn into the corner space before chaining 3 stitches)

There are lots of different styles of granny squares out there.  Crochet Me has a great free downloadable book of patterns using granny squares, all you need to do is sign up for their free email newsletters to get your hands on the booklet.

I hope you have enjoyed this tutorial and found it useful.  I would really appreciate any constructive feedback on how I could improve the tutorial or what you liked about it so my next ones can be even better. 

Keep tuned for a tutorial on different ways to join your squares together.